on paper.
And oh, how cute they turned out!

While painstakingly cutting around the little chin and nose of my toddler, I realized that making these silhouettes was great therapy. His outline was so cute; his cheeks still have some baby chub to them! And here I was getting impatient that he isn't acting like a big boy. Well he's not a big boy yet, and I don't want him to be. Not if it means he'll lose his adorable baby cheeks!
There was no way I could get mad at my children after memorizing their adorable little profiles.
It's great medicine for any frazzled mom. Just take some scissors to their little heads, on paper I mean, and you'll finish a cool, calm, and collected role model of a mother. :)
So here's how I made my silhouettes:
I took a profile picture of each member of the family (photo 1 below). It was very difficult to get the baby's photo (obviously), but my husband's as well! He had the kids in stitches with all his goofy and grotesque faces. I threatened to use one of the silly ones on my wall and he stood still long enough for me to snap the picture. Boys! I tell ya!
Then I cropped each photo to a 6 x 8 inch size, trying to keep the heads all relative, and printed each one (photo 2). The goal here is to just get the outline of each head, the rest doesn't matter.

I taped each head to a piece of black card stock paper and carefully cut out the profile (photo 3). You can try using a craft knife on a self-healing mat, but that didn't work for me. In this photo, I have my baby's head already cut out and am starting on the toddler's. Be sure to include all the little idiosyncrasies that make each child unique, especially wayward hair!
Next I taped each silhouette to a 6 x 8 inch white piece of card stock paper. This I then taped to an 8 x 10 inch piece of scrapbook paper (photo 4). Obviously the scrapbook paper is optional, but I wanted a bit of color on my wall and a unique design to go with each person's silhouette.
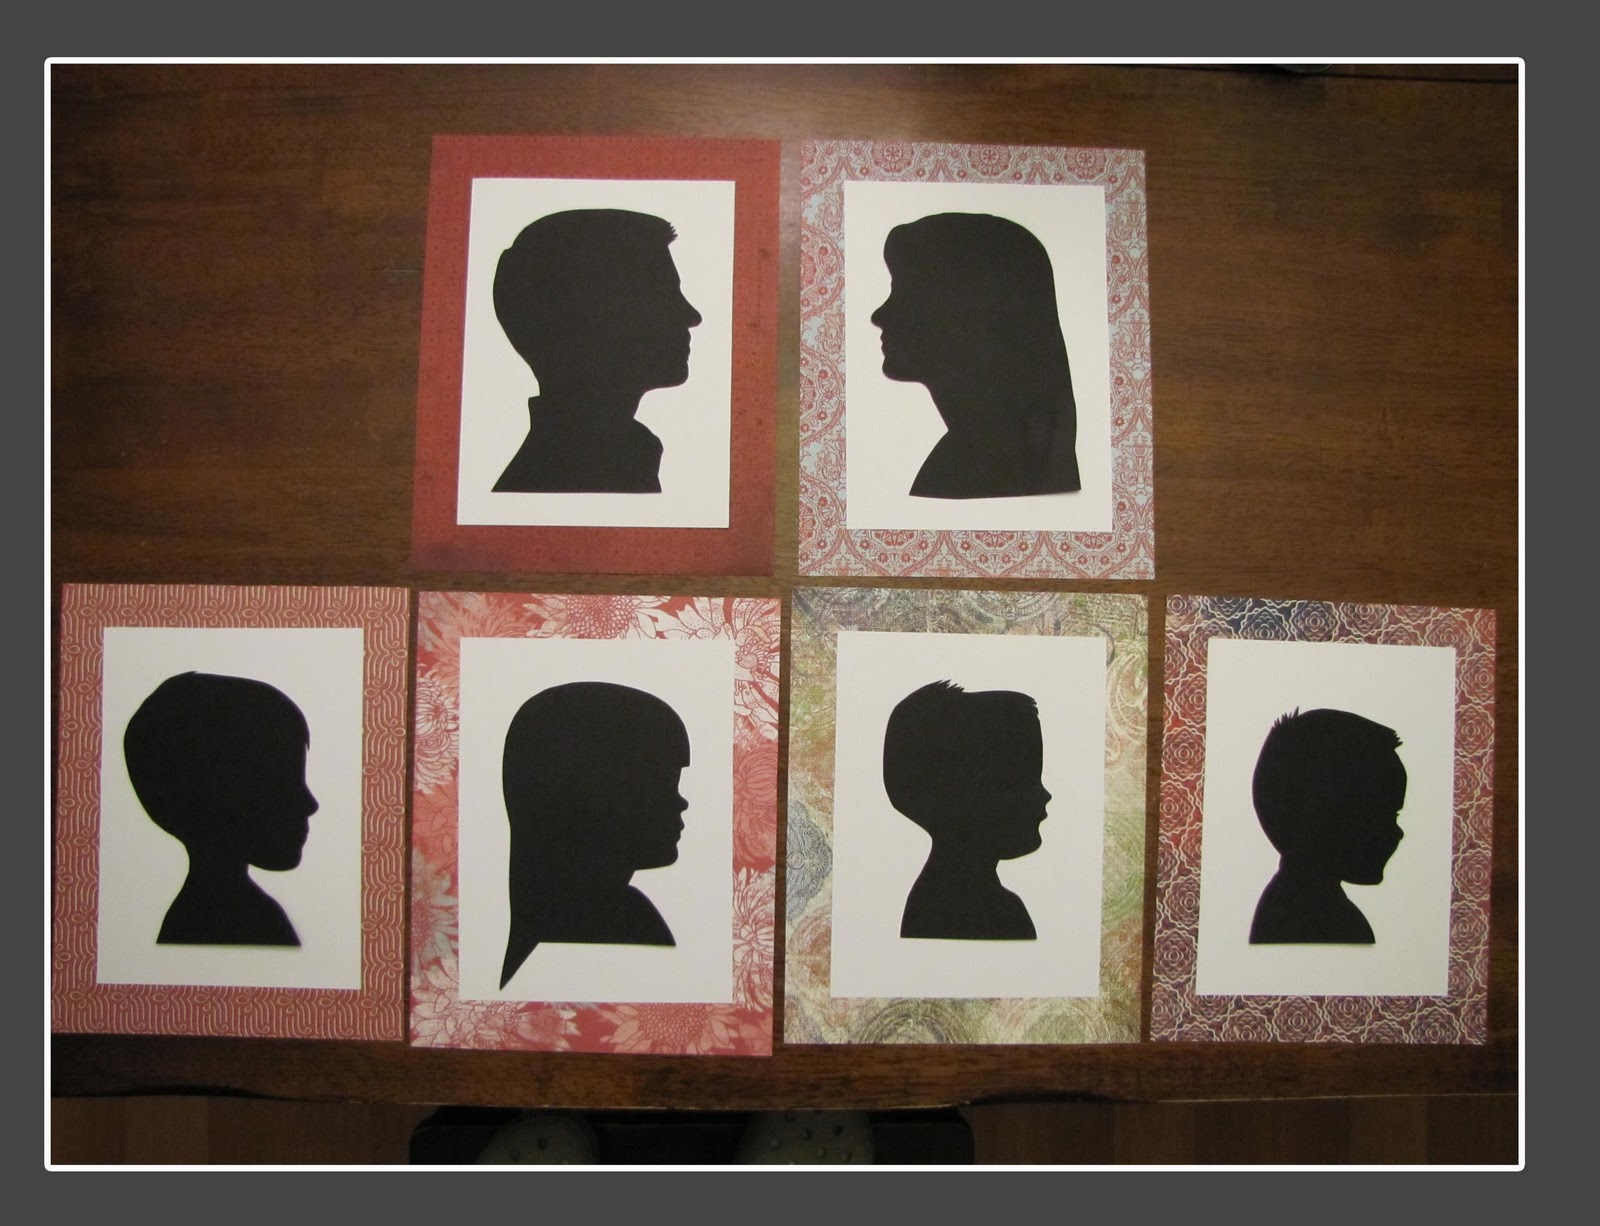
Each silhouette then went into a black frame, and voila! Here is the finished product!

Or should I line them all up in a row?
Or should I arrange them like this?
I think that I'm kind of leaning towards this last arrangement. It reminds me of a family tree.
I am so pleased with how these turned out! I think that I am going to re-do these every couple years (that's why I simply taped the papers rather than glued them). And my kids absolutely love them too! Connor asked me if he could hang his on the wall in his room above his bed. Then, the other day when I walked into the living room, the kids were playing with each frame, "walking" them around and having conversations with them.

"Look Mom! We are walking this way!"
so cute! can't wait to try it!
ReplyDeletecute Idea, BEAD ?? JK well you have an adorable family to try it on!
ReplyDeleteThese are terrific Keilah! That you manage to find the time to be so creative with so many kids is always inspiring! My Aunt & Uncle had a set of these done by a "professional" & I always loved them as a kid...I am totally going to try this out! Thanks for the idea!
ReplyDelete-Gina
wow! i love it!
ReplyDeletewish we lived closer... need to build up some family pics over here. :)