As I was unpacking my totes, Dean commented that "well, she's really settling in now, she's unpacking her china!"
Yes, I'm settling in. And I do love the feeling. Especially when setting a holiday table is as simple as taking a couple steps to the hutch and grabbing what you need.
So for a couple years I had been looking for a hutch. But it had to be a corner hutch to fit my dining room. I wasn't coming across too many used ones within 50 miles of home.
Until this oak one popped up on craigslist for $350. Three hundred and fifty dollars! Way more than I was willing to pay. And way more than anyone else would pay for that matter, because she replied to my "I'll offer you less" email after a couple weeks.
My memory is going at a terribly young age, because I suddenly can't remember what the dickens I actually paid for it! Oh, I think it was $150. Yes, that's what it was.
Either way, I was kicking up my heels to finally have my hutch, and I immediately started removing all the hardware, doors, and stained glass, because oak and brass are not me. It was particularly fun the Saturday I took a hammer to the mirror backing!
And then it sat in the garage while I waited for the sky to pour out sunshine and warmth so I could tackle the 'transformation of the hutch'.
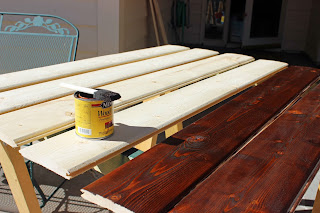
I decided to transform my hutch with a homemade chalk paint (the plaster of paris recipe), a can of flat black spray paint, some tongue and groove siding, and a can of red oak stain (because that's what I had on hand, but it is a bit too dark for my liking).
So I took to mixing the paint (a quart sample paint pot in satin did the trick), applying the two coats, and staining the wood paneling. Dean actually nailed these boards to the back of the hutch for me, because I wasn't having much luck getting the nails in at the right angle.
are you ready for this???
Incredible huh!? Who knew those countless boxes of Huggies would actually come in useful in more ways than one!
I couldn't wait to put all the pieces back together once the paint was dry, and haul it in the house!
Nevermind that there are no glass doors on the top yet. The glass shop was closed the day I did make it to that side of town. So those will hopefully be in place soon.
I do love the look of the delicate china in front of the wood boards. And the crisp clean white. And the black hardware. Actually, it would be fun to replace the hardware with something more ornate someday...
You know, regarding the homemade chalk paint, I really wasn't too sure about it as the paint was going on. My hutch took two coats of paint, a light sanding, and a coat of furniture wax. It wasn't until after I applied the wax that I loved the look of chalk paint on my hutch.
And quite honestly, I don't know if the process is that different (or easier) from sanding, applying one coat of primer, one coat of paint, and one coat of poly.
The wax was easier to apply than the poly anyway, so that's one perk of the chalk paint route.
Now if I were to paint the base and legs of my dining room table...I would definitely go the chalk paint route. It makes complete sense for rounded, grooved surfaces such as these.
I'm not sure what I'm waiting for, but I will let you know once I do get those legs painted. Won't it look fantastic and so much brighter?! And the two pieces will tie together so much more!
Okay, so maybe I need verification that I won't totally ruin my (8 year old) table by painting the legs white to match the hutch. Opinions? Paint the legs or leave them as is? Or should I just paint the bench legs?
I'd love to hear your ideas.


No comments:
Post a Comment